To ensure that your thermal sleeves support you in your regeneration for as long as possible, we have put together some tips for using the sleeves as well as some tips and instructions for using heat and cold. Please read the instructions for use carefully before using the thermal sleeves for the first time.
IMPORTANT USAGE INFORMATION
- We recommend that you keep the black zip bag that your thermal sleeve came in. So you have a practical storage bag in which you can transport and cool your sleeve easily.
- If possible, do not let your thermal sleeves get wet.
- Everyone has a different feeling. Even if we give you recommendations for use here, please listen to your own sensitivity to heat and cold and heat/cool the sleeve so that it is comfortable for you.
- If you are unsure how the Thermo Sleeve should best be used in your case, it is always best to consult your doctor.
CLEANING
To clean your thermal sleeves, simply use a damp cloth, gently wipe the surface and then allow the sleeves to air dry.
Attention: Your sleeves must NOT be put in the washing machine or in the dryer!
- Ankle
- Lower Leg
- Knee
- Thigh
- Wrist
- Forearm
- Elbow
- Upper Arm
Caution: You should avoid using it on open wounds, as this increases the risk of infection.

Heat and cold have opposite effects on the tissue:
Warmth:
- The blood vessels dilate
- Metabolic processes such as nutrient supply and defense processes run faster
- The muscles relax
Cold:
- The blood vessels narrow
- Metabolic processes slow down
Cold Areas of Application
Cold treatment products are typically used for...
- ... muscle and joint injuries
- ... ligament strains
- ... Pains
- ... Bruises
- ... Regeneration after training

Refrigerator:
- The thermal sleeve should not be too cold for the cold application. A temperature of 2-8 degrees is optimal.
- Place your sleeve in a resealable bag (e.g. in the bag provided) or other sealable container in the fridge.
- Chill the sleeve for at least two hours.
- You can simply store the Thermo Sleeve in the fridge until you use it.
Tip: If you want to cool down on the go straight after your workout, simply take your Thermo Sleeve with you in a small cooling bag.
Freezer:
Does it have to be fast? Then you can also cool your thermal sleeves in the freezer.
- Place your sleeve in a resealable bag (e.g. in the bag provided) or other sealable container in the freezer.
- Cool the sleeve for a maximum of 20 minutes.
- Chill the sleeve for at least two hours.
- You can simply store the Thermo Sleeve in the fridge until you use it.
Attention: Make sure that the sleeve does not get too cold in the freezer. The cooling should feel comfortable as before.

Instructions for various application scenarios:
1. Pre-cooling
Aim : counteract overheating → Overheating can be delayed in the case of endurance exertion of at least 20 minutes and high ambient temperatures.
- Put the thermal sleeve in the fridge for 2 hours.
- Cool the affected area for about 10-15 minutes.
- Go to your training as usual.
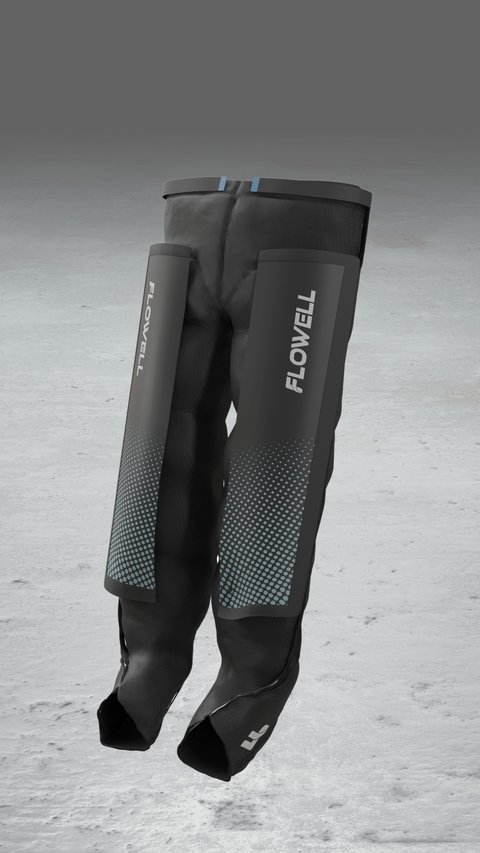
2. Use in combination with Flowell for swelling
Aim: Reduce swelling, reduce pain → The combination of cooling and compression reduces swelling and pain in acute injuries very well. In the event of an injury, to counteract swelling, you can use the cooling function of the thermal sleeves in combination with the flowell.
- Put the thermal sleeve in the fridge for 2 hours.
- Pull the thermal sleeve over the affected area.
- Step into the flowell with the thermal sleeve.
- Set a medium to high pressure level. Please pay particular attention to your own feelings when setting the pressure!
- Do not expose the chamber on the affected body part!
- It is best to choose one of the following programs:
- Flow
- Intense
- Intense flow
- Impulses
Heat Areas of Application
Heat treatment products are typically used against...
- ... muscle tension and cramps
- ... Muscle cramp
- ... pain in the muscles and joints

Microwave:
- Take the thermal sleeve out of the packaging to warm it up.
- Put the sleeve in the microwave for about 20 seconds → Important: Depending on which microwave you use, it may take longer or shorter to heat up.
- It is best to feel your way forward in 10-second increments.
- Check if the sleeve is the right temperature for you. It should feel comfortably warm, not hot.
- Repeat this step until the thermal sleeve is the right temperature for you.
- Important:
- - Do not heat your Thermo Sleeves in the microwave for more than 1 minute at a time and no more than 2 minutes in total!
- - If your Thermo Sleeves are frozen, first let them thaw at room temperature before warming them up.
Tip: If you want to cool down on the go straight after your workout, simply take your Thermo Sleeve with you in a small cooling bag.
Oven:
- Take the thermal sleeve out of the packaging to warm it up.
- Preheat the oven to 100 degrees hot air.
- Put the sleeve in the oven at 100 degrees for about 2 minutes.
- Then check if the sleeve is the right temperature for you. It should feel comfortably warm, not hot.
- If the sleeve is still too cool, simply place it in the oven for another 1 minute.
- Repeat this step until the thermal sleeve is the right temperature for you.
Tip: If you want to cool down on the go straight after your workout, simply take your Thermo Sleeve with you in a small cooling bag.


Instructions for various application scenarios:
1. Tension & sore muscles
Aim: Muscle loosening and relaxation
- Heat the Thermo Sleeve in the microwave or in the oven as described above.
- Pull the thermal sleeve over the affected area.
- Warm up the relevant body region for approx. 15-25 minutes.
- Repeat the warm-up as many times as you like.
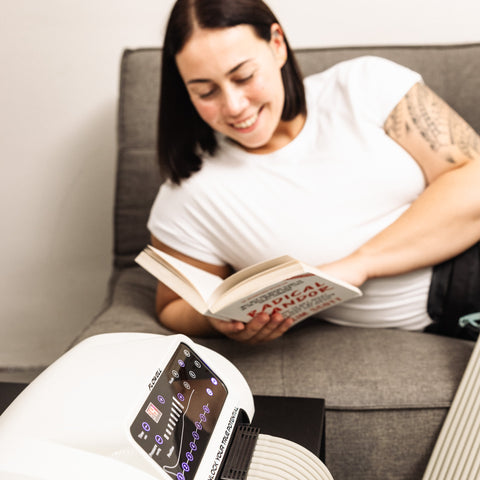
2. Use in combination with Flowell for swelling
Aim: Stimulate blood circulation, relax muscles
- Heat the Thermo Sleeve in the microwave or in the oven as described above.
- Pull the thermal sleeve over the affected area.
- Step into other Flowell products with the thermal sleeve.
- Set a low to moderate pressure level. Please pay particular attention to your own feelings when setting the pressure!
- Do not expose the chamber on the affected body part!
- It is best to choose one of the following programs:
- Doubles
- Intense
- Intense flow
- Intense pulses
We recommend an application of approx. 30 minutes or until the warming effect of the Thermo Sleeves wears off.